在文章Python之单元测试使用的一点心得 中,笔者介绍了自己在使用Python测试工具coverge的一点心得,包括:
使用coverage模块计算代码测试覆盖率
使用coverage api计算代码测试覆盖率
coverage配置文件的使用
coverage badge的生成
本文在此基础上,将会介绍coverage的高阶使用,包括:
1 2 3 4 5 6 7 8 9 10 11 12 13 14 15 16 17 18 from flask import Flask@app.route('/' def index ():return "Hello index" @app.route('/test' def test ():return "Hello test" if __name__ == '__main__' :"0.0.0.0" , port=5000 , debug=True )
正确的测试代码如下:
1 2 3 4 5 6 7 8 9 10 11 12 13 14 15 16 17 18 19 20 21 22 23 24 25 26 27 28 29 30 31 32 import unittestfrom flask_app import appclass AppTestCase (unittest.TestCase):def setUp (self ):def tearDown (self ):def test_case1 (self ):"/" )200 )"Hello index" )def test_case2 (self ):"/test" )200 )"Hello test" )if __name__ == "__main__" :'test_case1' ))'test_case2' ))
coverage多文件测试
我们有如下的实现两个变量相加的代码(func_add.py):
1 2 3 4 5 6 7 8 9 10 def add (a, b ):if isinstance (a, str ) and isinstance (b, str ):return a + '+' + belif isinstance (a, list ) and isinstance (b, list ):return a + belif isinstance (a, (int , float )) and isinstance (b, (int , float )):return a + belse :return None
两个测试文件test_func_add1.py和test_func_add2.py,内容如下:
1 2 3 4 5 6 7 8 9 10 11 12 13 14 15 16 17 18 19 20 21 22 23 24 25 26 27 28 29 30 31 32 33 34 35 import unittestfrom func_add import addclass TestAdd (unittest.TestCase):def setUp (self ):pass def test_add_case1 (self ):"Hello" "World" print (res)"Hello+World" )def test_add_case2 (self ):1 2 print (res)3 )if __name__ == '__main__' :'test_add_case1' ))'test_add_case2' ))
1 2 3 4 5 6 7 8 9 10 11 12 13 14 15 16 17 18 19 20 21 22 23 24 25 26 27 28 29 30 31 32 33 34 35 import unittestfrom func_add import addclass TestAdd (unittest.TestCase):def setUp (self ):pass def test_add_case3 (self ):1 , 2 ]3 ]print (res)1 , 2 , 3 ])def test_add_case4 (self ):2 "3" print (None )None )if __name__ == '__main__' :'test_add_case3' ))'test_add_case4' ))
使用命令进行测试:
1
2
3
coverage run test_func_add1.py
生成的代码测试覆盖率如下:
1
2
3
4
5
Name Stmts Miss Cover
这是不符合我们预期的,因为在这两个测试文件中我们对所有的代码都进行了测试,理论上测试覆盖率应该为100%,之所以这样,是因为coverage run命令运行时每一次都会覆盖掉之前的测试。正确的测试命令(以文件追加的形式)如下:
1
2
3
coverage run test_func_add1.py
此时代码覆盖率如下:
1
2
3
4
5
Name Stmts Miss Cover
coverage的Gitlab CI/CD集成
在文章Gitlab
CI/CD入门(一)Python项目的CI演示 中,笔者介绍了Gitlab
CI/CD的入门。在此基础上,我们将集成coverage。
首先我们的test目录如下:
1
2
3
4
.
func_add.py为实现两个变量相加的代码,如前述。test_func_add.py为测试代码,如下:
1 2 3 4 5 6 7 8 9 10 11 12 13 14 15 16 17 18 19 20 21 22 23 24 25 26 27 28 29 30 31 32 33 34 35 36 37 38 39 40 41 42 43 44 45 46 47 48 49 50 51 import unittestfrom func_add import addclass TestAdd (unittest.TestCase):def setUp (self ):pass def test_add_case1 (self ):"Hello" "World" print (res)"Hello+World" )def test_add_case2 (self ):1 2 print (res)3 )def test_add_case3 (self ):1 , 2 ]3 ]print (res)1 , 2 , 3 ])def test_add_case4 (self ):2 "3" print (None )None )if __name__ == '__main__' :'test_add_case1' ))'test_add_case2' ))'test_add_case3' ))'test_add_case4' ))
CI/CD依赖.gitlab-ci.yml,配置如下:
1
2
3
4
5
6
7
8
9
10
11
12
13
14
15
16
17
18
19
stages: - build - unittest build-job: stage: build script: - echo `date` - echo "Hello, $GITLAB_USER_LOGIN!" - echo "This job deploys something from the $CI_COMMIT_BRANCH branch." unit_test_job: stage: unittest image: python:3.9-alpine3.17 script: - pip3 install coverage==7.3.0 - coverage run test/test_func_add.py - coverage report coverage: '/TOTAL.*\s+(\d+%)$/'
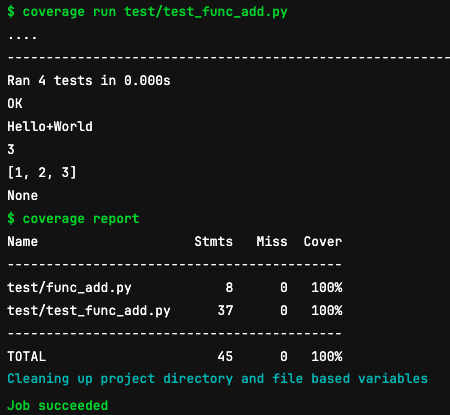
运行CI/CD,结果如下图:
unittest_job运行结果
在Gitlab项目中的Settings -> CI/CD -> General pipelines中点击Expand,会显示CI/CD已内置Pipeline status, Coverage report, Latest release,其中Coverage repor如下图:
Coverage report
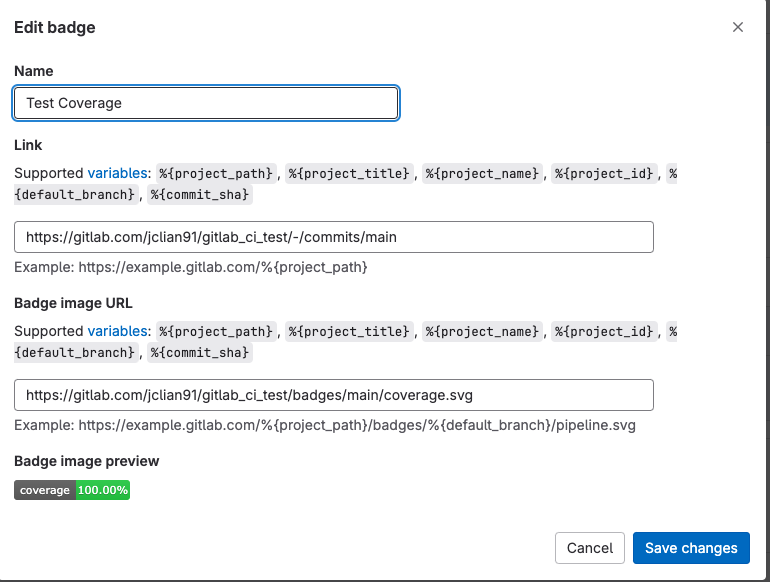
最后我们要在项目中加入coverage
badge(徽章),在Gitlab项目中的Settings -> General -> Badge中点击Expand,再点击Add
badge,coverage徽章的配置如下:
Add badge
本项目中只有main分支,因此不需要设置变量,实际在使用过程中,需要配置变量如default_branch等。
以上配置完毕后,项目徽章显示如下:
成功加入徽章!
以上配置过程已开源,项目网址为:https://gitlab.com/jclian91/gitlab_ci_test
。
coverage badge生成
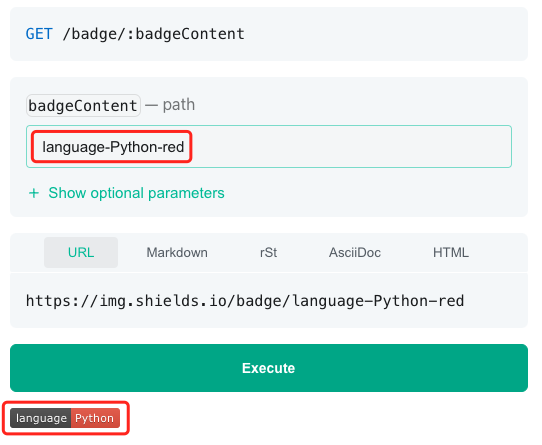
coverage badge生成方式分为静态和动态。
动态的话,可使用coverage-badge或者genbadge模块。
静态的话,可使用网站:https://shields.io/badges/static-badge
.
比如我们生成编程语言的徽章,如下图:
示例徽章生成
之后我们就可以用该网址访问徽章了。
总结
本文介绍了测试工具coverage的高阶使用,希望能对读者有所启发~
欢迎关注我的公众号
NLP奇幻之旅 ,原创技术文章第一时间推送。
欢迎关注我的知识星球“自然语言处理奇幻之旅 ”,笔者正在努力构建自己的技术社区。


